In this part, will walk you through configuring Cisco Umbrella, focusing on setting up the roaming client or deploying the necessary Umbrella packages for device protection. We’ll also cover how to package the Umbrella client properly for Intune deployment. Once prepared, you'll learn how to upload the Umbrella package to Intune, configure deployment policies, and assign them to your target devices.
After the deployment, we'll explain how to monitor its status and verify that Cisco Umbrella is working as intended on the devices. Finally, we’ll include a troubleshooting section to address common issues that may arise during the deployment process. By the end, you'll have a clear understanding of how to integrate Cisco Umbrella with Intune to ensure enhanced security across your organization’s devices.
To deploy Cisco Umbrella via Intune, you must have at least a Cisco Umbrella DNS Essentials license and a valid Microsoft Intune subscription.
Configuring Cisco Umbrella Roaming Client Settings & Obtaining the profile
Firstly we need to start off with configuring the Cisco Umbrella Roaming Client settings by navigating to the Umbrella dashboard under Roaming Computers, where you can adjust security policies to suit your organization’s needs. Once configured, you can download the profile, which contains the necessary parameters to deploy the roaming client and ensure seamless DNS-layer protection for your devices.
- Login to dashboard.umbrella.com > Click on Roaming Computers > Click on Roaming Client (Download Icon)
- Download Module Profile which you will use when creating the Cisco Secure Client Management Deployment
We have skipped the settings assuming you have configured them to your needs if not refer to this link Umbrella Roaming Computer Settings
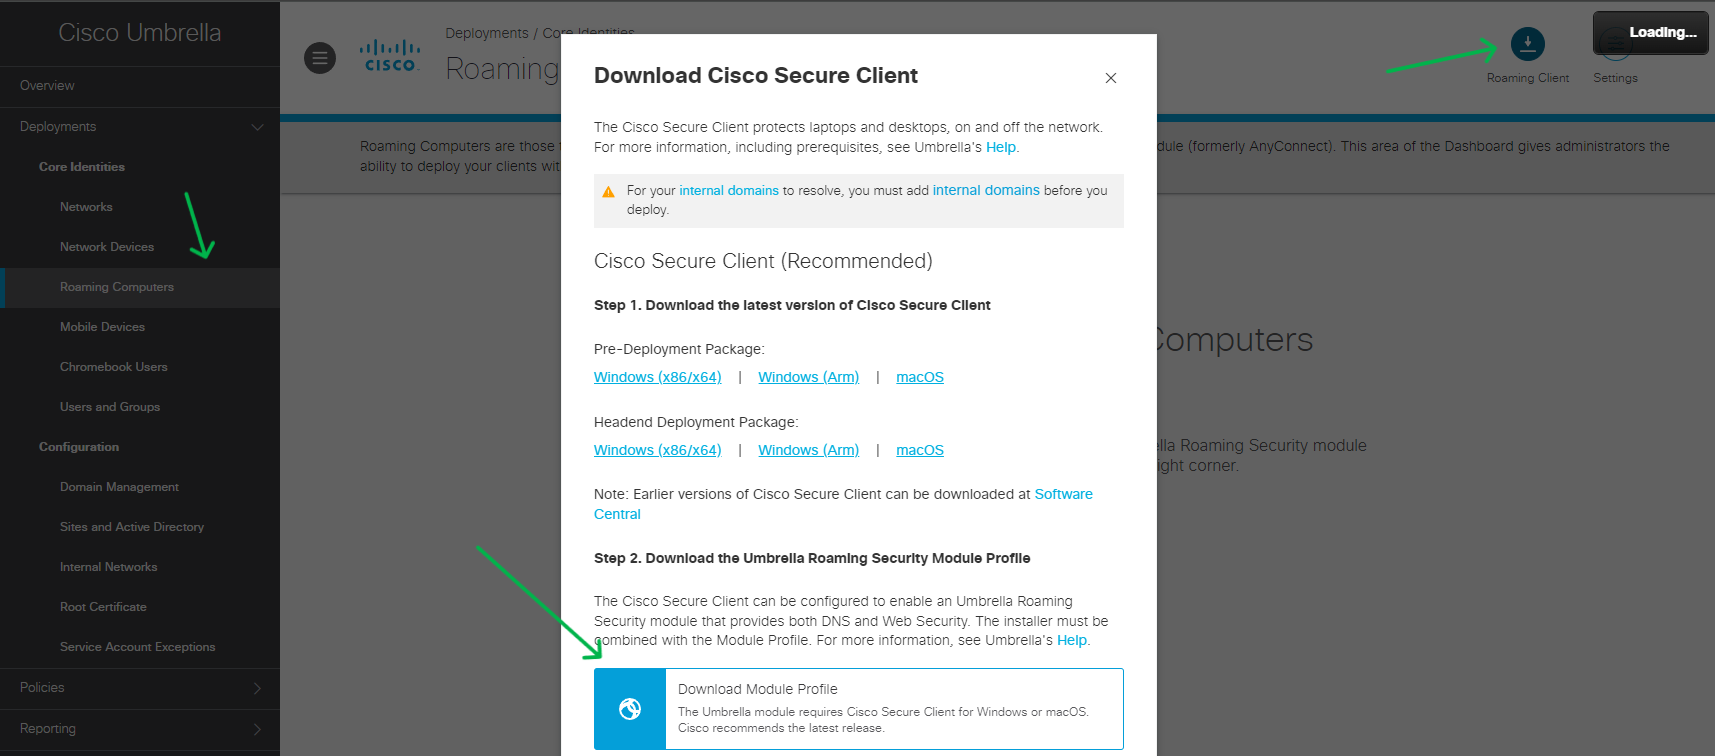
After clicking on Download Module Profile you will start to download a file called "OrgInfo.json" that is your Cisco Umbrella profile basically that you will upload to Secure Client Management portal when creating the deployment
Uploading Cisco Umbrella Profile into Secure Client Profile
In this step, you'll upload the Cisco Umbrella profile into the Secure Client Profile to enable seamless integration and enforcement of security policies. This ensures that the Secure Client can apply Umbrella's DNS-layer protection across all connected devices in your network.
- Client Management > Profiles
- Upload > Umbrella > Import the OrgInfo.json file > Give it a name
You will see the Cisco Umbrella Profile you uploaded in the list.

Creating a Cisco Secure Client Management Deployment
We will be using Cisco Secure Client Management to deploy Cisco Umbrella via Intune. This platform allows for centralized configuration and management of security profiles, enabling seamless integration of services like Umbrella. By leveraging this management tool, we ensure consistent security policies and simplified deployment across all managed devices.
- login to security.cisco.com > launch Secure Client Management EU (please choose your respective region i am in England so we will be using EU).
- Click on Client Management > Deployments
In this section you are able to see all the deployments you have created and assoiated profiles.
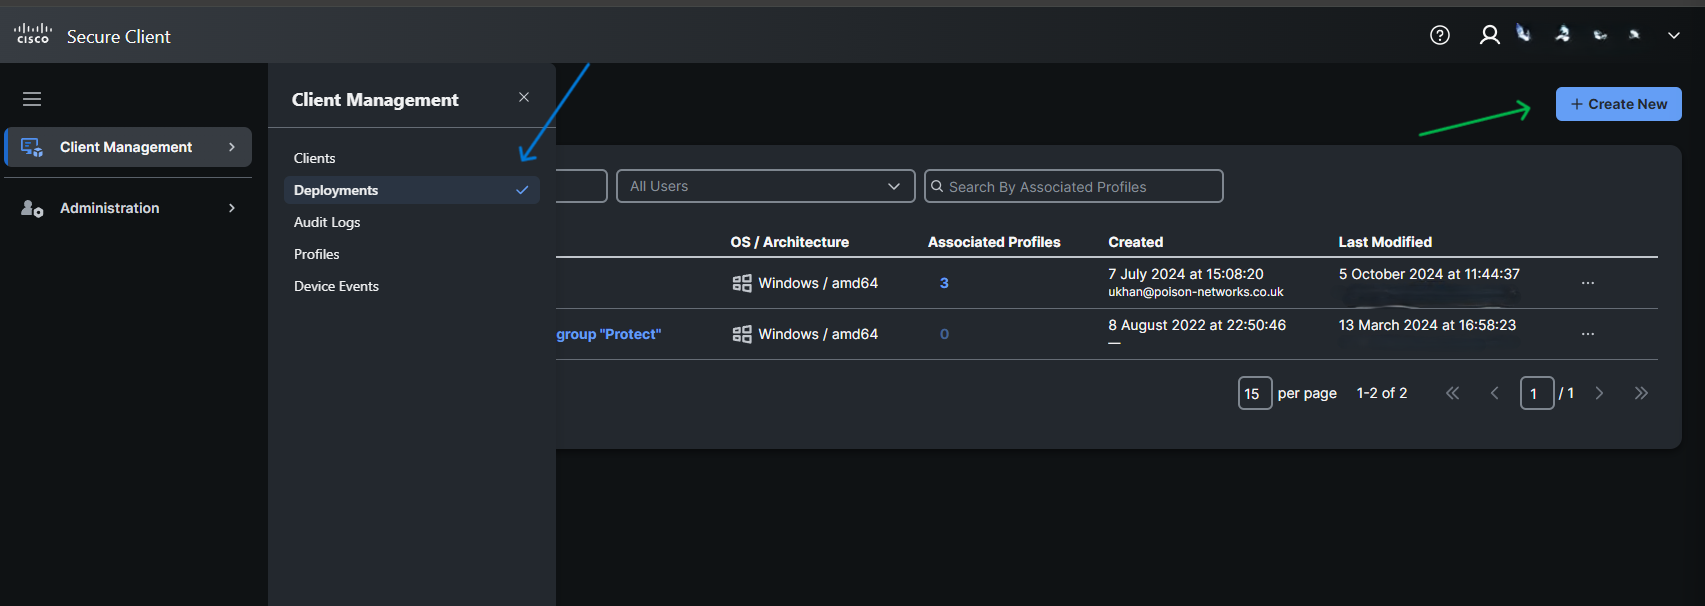
- Windows amd64 (As we are deploying to a 64 bit Win11 Endpoint) > Type in a unique Deployment Name
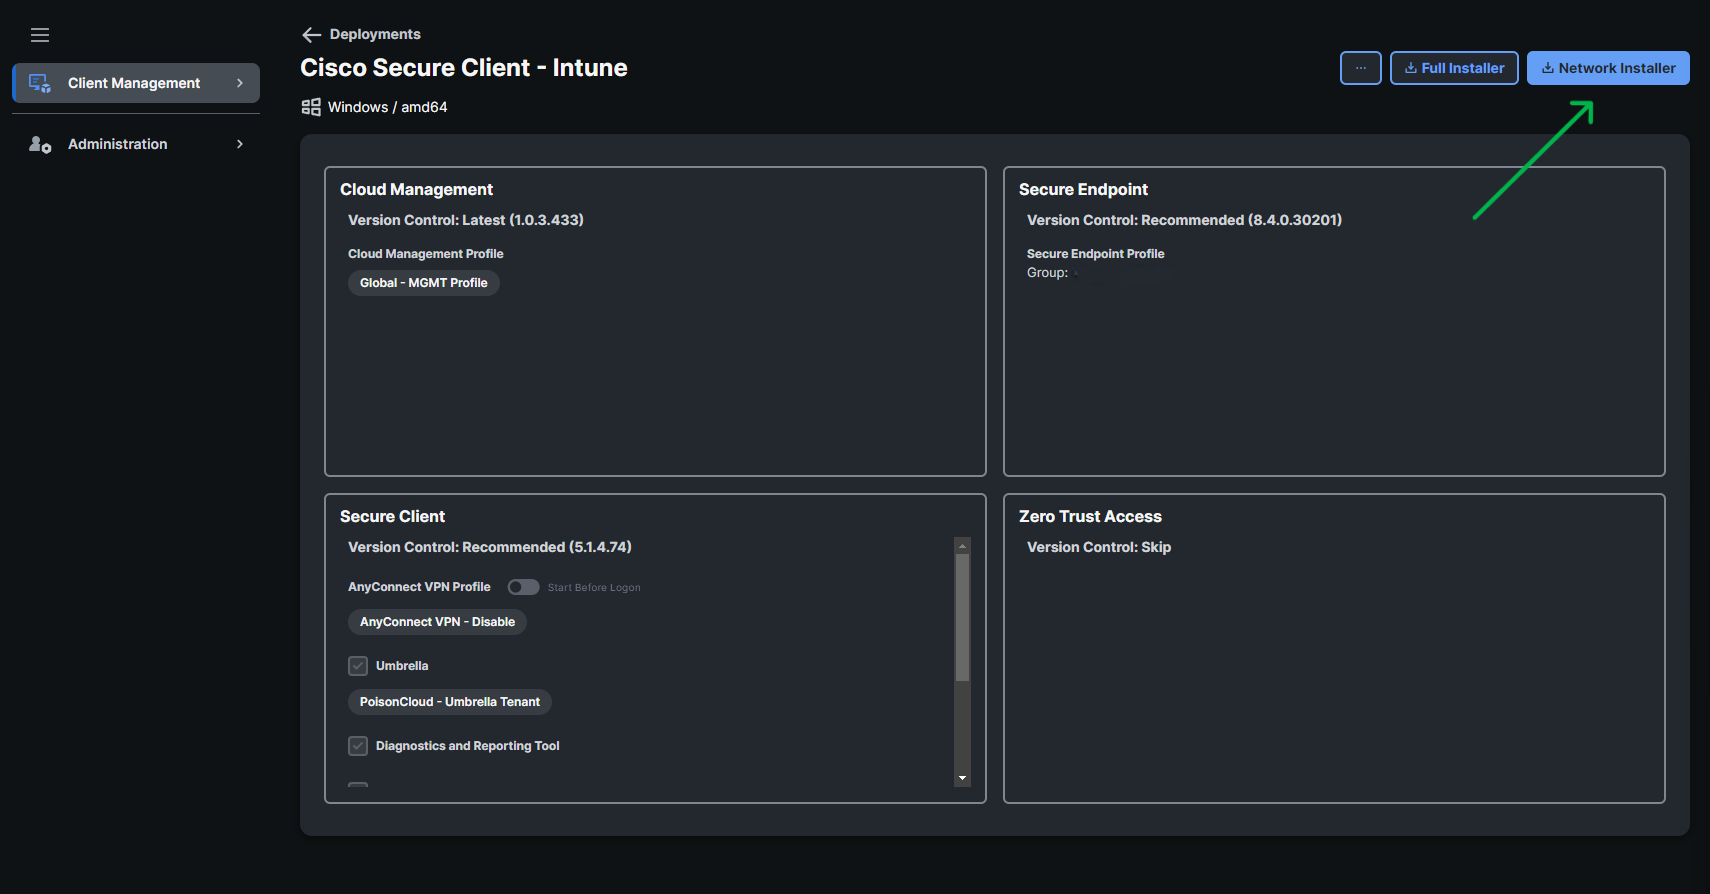
Cloud Management Settings
Version Control: Latest
Cloud Management Profile: Select the profile you have created for agent management (if non is created refer to Cisco Cloud Management Profile)
Secure Endpoint Settings
Version Control: Skip (Select version if you have Secure Endpoint Entitlement)
Secure Client Settings
Version Control: Latest
Umbrella: Checked
Zero Trust Access Settings
Version Control: Skip (Unless you have Entitlement to use this functionality)
- Click on save you will see your deployment being created it
- Click on the deployment name and download "Network Installer" (This is a lite agent which will only contain the management framework. It will pull the profile from Cisco Security Cloud and enable features we have selected when creating the deployment
Deploying Cisco Umbrella Certificate to endpoint
This certificate is used for SSL decryption, if the certificate is not pushed out to the endpoint you will be getting HTTPS insecure errors.
- Intune Portal > Device > Configuration > Create > New Policy
Platform: Windows 10 or later
Profile Type: Templates
Select Trusted Certificate this will allow you to place Cisco Umbrella certificate into the trusted root chain of the windows endpoint
Upload Cisco Umbrella CA
Destination Store: Computer certificate store - Root (Its only a single tier CA)
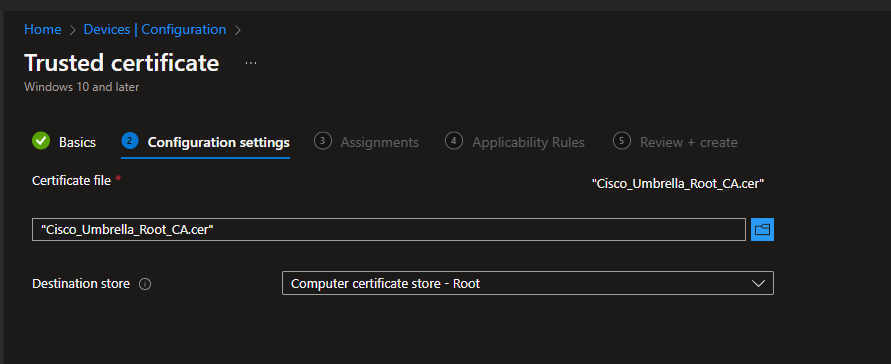
Assign it to your endpoint group certificate will successfully deploy then you will no longer get HTTPS insecure error's when visiting sites.

Upload installer to MS Intune & Configure App Deployment
To deploy Cisco Secure Client via Microsoft Intune, start by uploading the Cisco Secure Client Management Installer into the Intune portal. Once uploaded, configure the app deployment settings, including assigning user groups and defining installation criteria to ensure smooth deployment across targeted devices. This integration enables centralized management and automated installation, streamlining client deployment and enhancing security for all endpoints.
- Using the IntuneWinAppUtil create a Intunewin file for MS Intune
- Login Intune Portal > Apps > Windows
- Click on Add > Select Windows app (Win32)
- Upload the intunewin file you just created using the IntuneWinAppUtil
- Modify the name, description, app version and other parameters needed to identify the deployment > click next
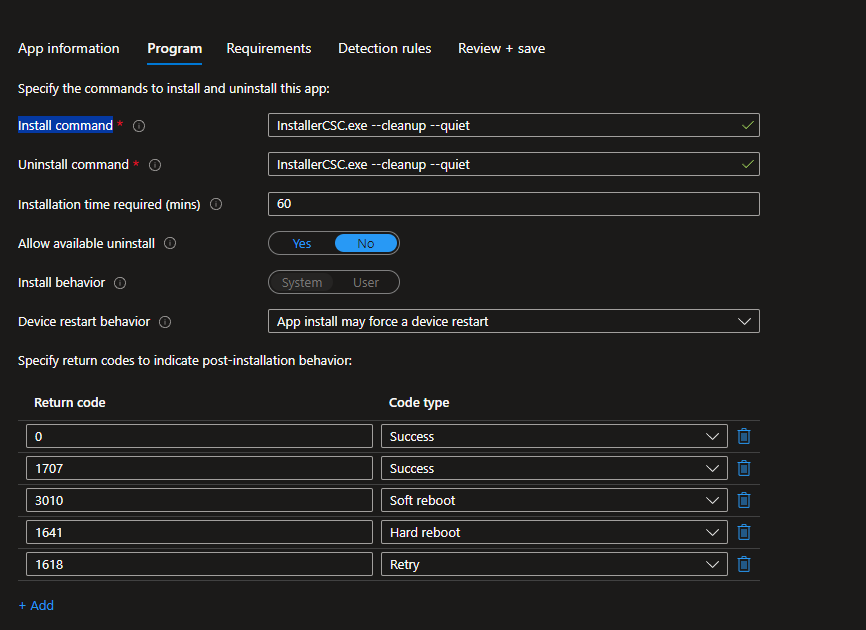
So for Install and Uninstall command use as following:
InstallerCSC.exe --cleanup --quiet
Raw
Make sure to use what your network installer file name is change if needed.
-
Next
-
Configure system requirements make sure its 64-bit operating system architecture as the installer only supports 64-bit
-
Configure Detection rule as on the screenshots
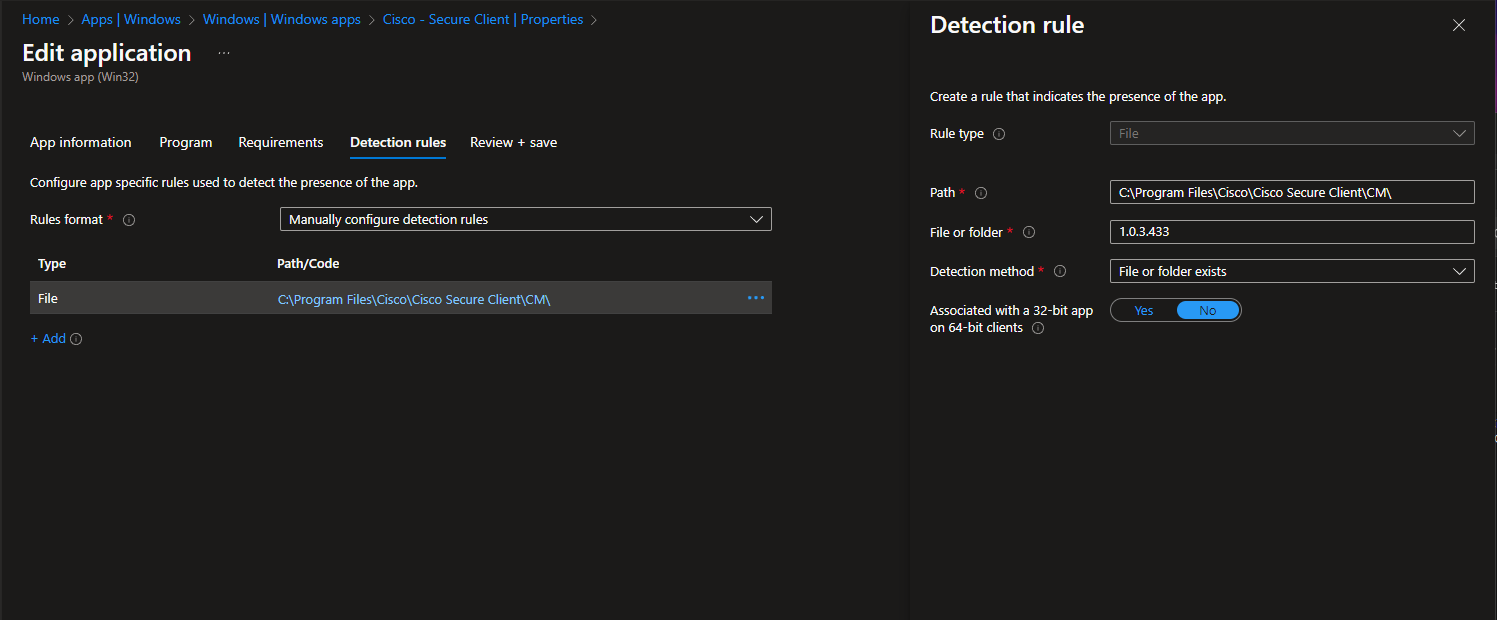
Version number is based on the Configuration Managment version
- Add Assignments, Review and Save
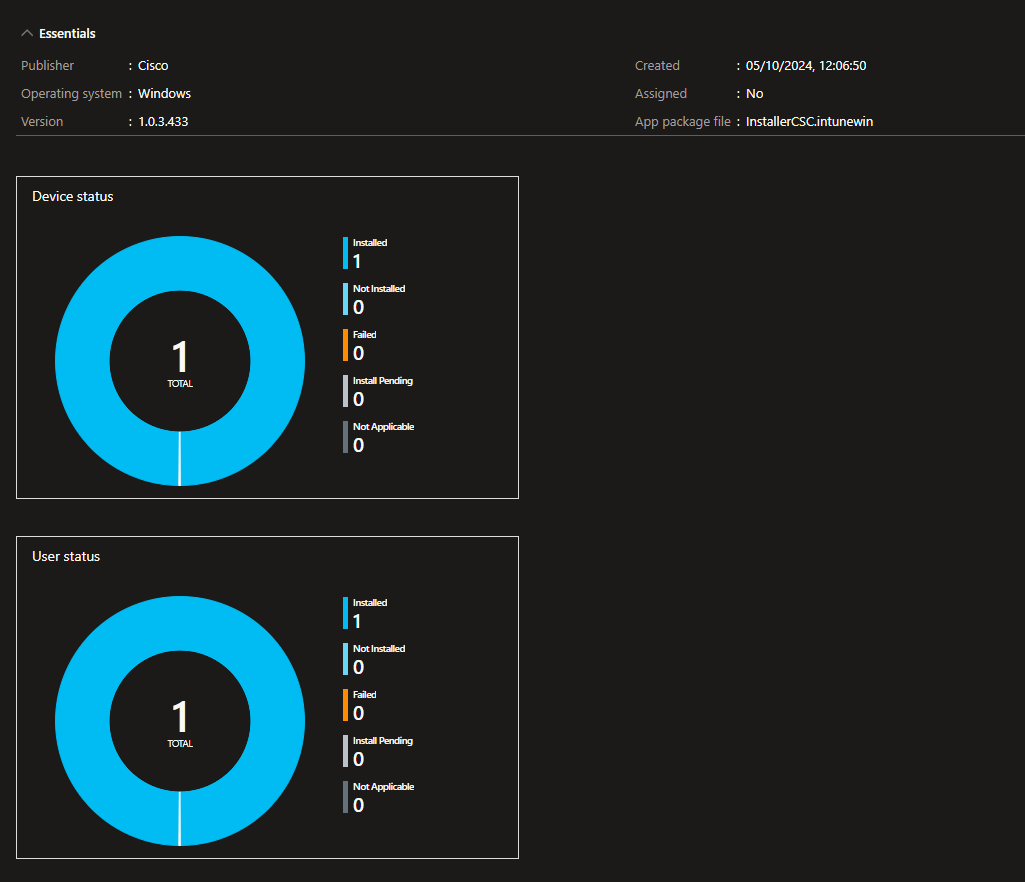
You will see the app deploy successfully and appear within Roaming Computers section in Cisco Umbrella

Next upcoming posts we will see how to configure policies and block applications/websites.